Moved to : https://blog.busymind101.com
Welcome. Since Microsoft acquired Github on June 4, 2018, many developers, as well as companies have migrated to other horizons. Well… to Gitlab. I also took the same path…

Ah! ha! Microsoft, you’re not gonna get us this time.
If you have already migrated to Gitlab, or if you stay in the Titanic… hm. Github. So I invite you to travel with me to install a Bot WebHook for your gitlab repo on your Discord. If you haven’t already, you can try it. Let’s talk a bit about Discord; Discord is a platform mostly centered around gaming but it is no less useful for other types of uses, a steroid skype. Plus it’s free and provides plenty of other features. Then what are you waiting for?

What do you think the Discord logo is? 🤔
So back to the title, use a Webhook with Discord. A Webhook is a bit like an API, but the difference is that it sends the data you want in real time.
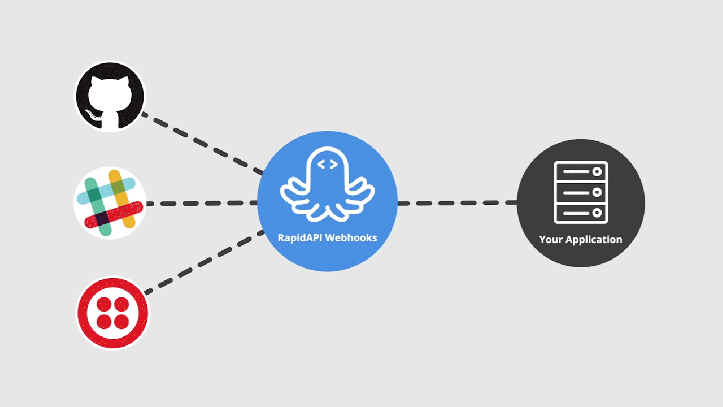
Source: http://webhooks.rapidapi.com/
Basically, an API, it must each time request information via the HTTP protocol, while a Webhook sends POST using event notification; that is, it sends data when an event occurs. (Imagine it as a chat on social networks).
In the case of Gitlab or Github, or other type of VCS (Version Control System), a Webhook allows to have real-time information, if you have done actions such as;
- push
- comment
- merge
- adding a wiki
And among others – we can say all possible actions. Thus one can create a software around webhooks which can read these events. It is very useful when working in a team, especially if you want to know what happened during your absence or to follow changes remotely.
The steps
- Connect to Gitlab.
- Create a repo, then open it,
- Now navigate in the options, in the case of gitlab, it is in the navigation bar on the left. Click Settings and select Integrations.
- You will see that there are selection buttons and a URL bar.
- Add; https://www.yappybots.tk/gitlab in the Gitlab URL bar, then check the boxes you want to be notified. For this tutorial, I advise you to check everything.
- And click on “Add Webhook” (a green button, all the way down).
- At that moment, you will use your Discord,
- You can navigate on this link: https://bots.discord.pw/bots/303661490114789391
- Click Invite,
- A page will open asking you to connect, then to choose in which server you want to add the Bot. If you don’t have a server, you can create one on Discord. By clicking on this,
 , you give it a name.
 - As soon as you are finished, do: GL! init username/repo. Of course by replacing username by your nickname or the one who has the repo, then the name of the repo. In case the repo is private, add private at the end. Like this: GL! init torvalds/linux private.
- When you’re done, you’ll get a message of success.
Here you are, you will be notified of all changes made to the repo. Now try a push request to see the result. Note that this can be reproduced on another platform, such as Slack.
Follow me on the busymind101 blog and on my twitter @theArtechnology.

Hmm it seems like your site ate my first comment (it was super long) so I guess I’ll just sum it up what I
submitted and say, I’m thoroughly enjoying your blog. I as well am an aspiring
blog blogger but I’m still new to everything. Do you have any tips for
inexperienced blog writers? I’d genuinely appreciate it.
LikeLiked by 1 person
Hello, Thank you very much for your message 🙂
There is no special ingredient for a good blog, just write whatever you love. Also keep in mind that when writing, try to make yourself be understood; step backward and try to be someone who isn’t in your mind !
Happy blogging 🙂
LikeLike
Hi, I would like to subscribe for this webpage to obtain most up-to-date updates, therefore
where can i do it please help out.
LikeLike